Photoshop Tutorial for FFR Profile Banner
As a response to madmatt621's thread, I thought I might give an image tutorial on how to fit a non-resized portion of an image within the maximum dimensions of the banner using Photoshop. Different versions of Photoshop may not have this capability, but I'm sure CS2 and CS3 do.
Basically, what this tutorial will show you is how to make a banner like this: 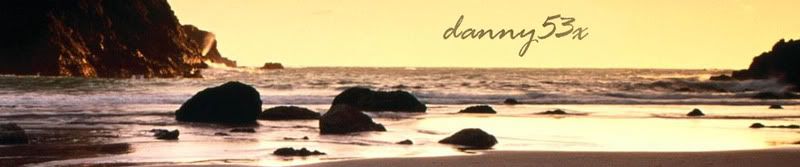 (Step 1): Find an image you would like to use for your banner. Personally, I would recommend using a search engine or an image board to find an image with considerably large width since your banner should accommodate it without any size modifications to maintain maximum quality. If you are using someone's artwork, you may want to give them credit. Save the image to your hard drive. 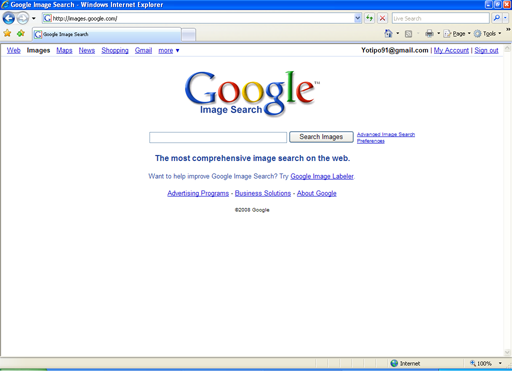 (Step 2): Open your Photoshop program. Since the maximum size of your banner can be 960 pixels by 200 pixels, press Ctrl+N (or File -> New) and set the width to 960 pixels, and the height to 200 pixels. Make sure the measurements are in pixels and not inches, otherwise your image will become much larger than you want. If you plan on blending the banner into the background, then you should select under Transparent under Background Contents. For this tutorial, however, I'll only work with "White" just so you can see the basics. Press enter, or click OK to continue creating your new blank file. 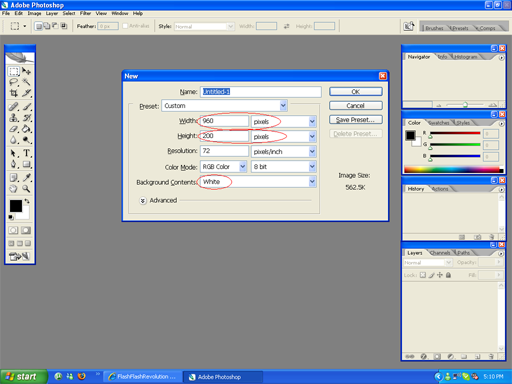 (Step 3)]: While keeping the blank image file open, either drag the image file you plan to make your banner into the Photoshop window, or inside of Photoshop, press Ctrl+O and manually search for your file. Once your image has been imported, you then should have an idea of where you'd like to fit your image into the banner's dimensions. Click the blank 960x200 image to make it your active window and press Ctrl+A. This automatically signals photoshop to use the marquee tool to make a selection around everything in the image. You must realize that the selection you have made is very functional and capable of doing things beyond simply manipulating what's inside the selection. Simply moving the rectangular selection will not move what it contains, but rather the rectangle itself. Further on, you may want to move what is selected; then you would hold Ctrl and drag. For now, we want to move the selection on to the image file you have just imported. Simply drag the selection onto the image file, and your 960x200 selection should now exist on your image. 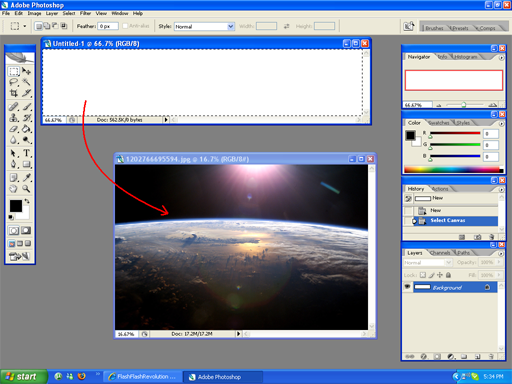 (Step 4): Move the selection to the portion of the image that you would like to become your banner. Zoom to 100% using the Zoom tool if needed to see if this is exactly how you would want to see your banner. Once it is correctly positioned, press Ctrl+C or on the menu bar, click Edit->Copy. This temporarily stores your selection onto your clipboard; the clipboard is an invisible part of storage on your computer. Return to the original blank image file, and click it to make it active. Press Ctrl+V or on the menu bar, click Edit->Paste to place what you have picked up on your clipboard. If done correctly, the dimensions of what you copied should fit exactly into the file. 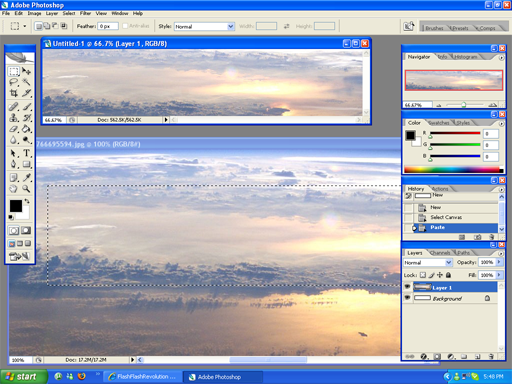 (Step 5): You may want to add text to your banner. Click the text tool and position where you want to type a message, or just simply your username. Remember that everytime you add new text in a new location, a new layer is added. Make sure to manage your layers well so you know what you are working on. To make a simple blending of text into your image, take the text layer's opacity down to 50%.  (Step 6): Once you are done editing your banner to its finest perfection, it's time to put it up... But not just yet! Make sure you save your image as a common image file. The default for saving photoshop images is .psd. This type of file was not made for sharing widely across the internet. All your layers and editing features will be kept, but it will not display correctly in a standard internet browser. If you are planning to come back to this file to edit it the way you originally did in photoshop, however, then it wouldn't hurt to save an extra copy of this image in .psd form. When you plan to upload this banner, I suggest either .jpg or .png. Here is a good demonstration of the differences between the two. Once you have your .png or .jpg, you can use the tutorial mentioned at the beginning of this tutorial to get your image onto your profile. And here's the final product! 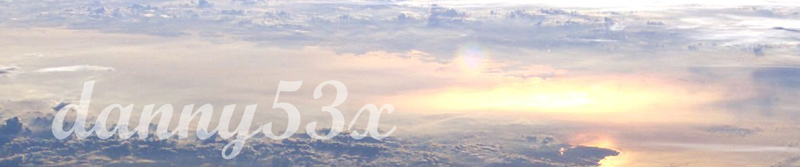 Thanks for reading! Questions and Comment are appreciated, danny53x |
Re: Photoshop Tutorial for FFR Profile Banner
Saunders.
If someone can navigate to a forum they have the capabilities to add text to an image. Lol. |
Re: Photoshop Tutorial for FFR Profile Banner
lol'd
|
Re: Photoshop Tutorial for FFR Profile Banner
Simple, but if you're looking for a more natural-image related banner, it works...
You could probably do this in paint though... |
Re: Photoshop Tutorial for FFR Profile Banner
I didn't know any of that.
|
Re: Photoshop Tutorial for FFR Profile Banner
Pretty basic Photoshop knowledge... I guess it will be useful to some, though. I had actually planned on making a tutorial on how to transition backgrounds and banners...
|
Re: Photoshop Tutorial for FFR Profile Banner
It's supposed to be pretty basic.
I made 7eed and Manrae's banner too. I tried bg/banner blending on 7eed too. |
Re: Photoshop Tutorial for FFR Profile Banner
Nice tutorial,
my banner's the best.... |
Re: Photoshop Tutorial for FFR Profile Banner
Layer styles also help, it creates a rounded better edge to your banner.
For mixing it with your background you might want to take the eyedropper tool after a prntscrn and paste. |
Re: Photoshop Tutorial for FFR Profile Banner
Quote:
colorful circles and gray text is totally awesome |
Re: Photoshop Tutorial for FFR Profile Banner
|
Re: Photoshop Tutorial for FFR Profile Banner
lol Thats not that good of a banner but whatever. People could just ask those who are skilled in photoshop to make them a banner.
|
Re: Photoshop Tutorial for FFR Profile Banner
can someone make me a banner of the folowing
.width 960 pixels, and the height to 200 pixels .color black&red .Theme Slipknot preferabley Corey lead singer in theme .with FFR arrows in background Thanks:HopeIsKnotLost |
Re: Photoshop Tutorial for FFR Profile Banner
Quote:
Yeah, not surprising. |
Re: Photoshop Tutorial for FFR Profile Banner
Max banner size is 942x196. Not 200.
|
Re: Photoshop Tutorial for FFR Profile Banner
really useful thanks :D
|
Re: Photoshop Tutorial for FFR Profile Banner
i would take a banner too if someone would make me one with all the color of the ffr arrows into it with my nam e with some pretty fancy letters id give a good amount of credits for it
|
Re: Photoshop Tutorial for FFR Profile Banner
Good tutorial. :D
|
Re: Photoshop Tutorial for FFR Profile Banner
sticky thread right here =D
|
| All times are GMT -5. The time now is 12:16 PM. |
Powered by vBulletin® Version 3.8.1
Copyright ©2000 - 2024, Jelsoft Enterprises Ltd.
Copyright FlashFlashRevolution